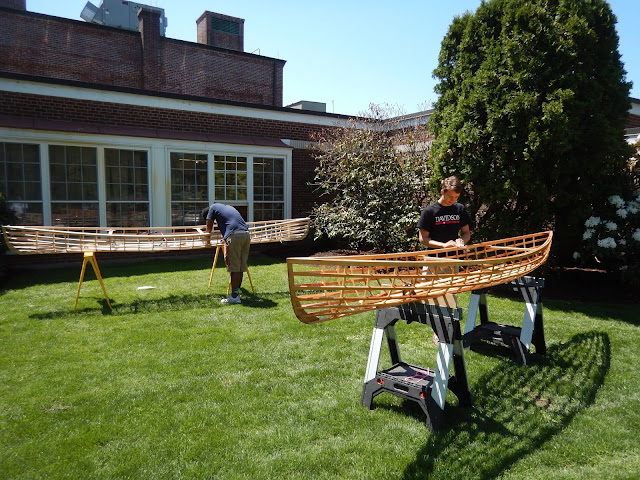
We did much of the final sanding and varnishing out on the lawn just outside our shop. The boats were light enough to slip out the window just behind the left hand boat in the picture. For spots that needed real faring like the sharp edges of stringers as they twist toward the bow, we used a belt sander, but most of the sanding could be done by sanding blocks with grits of 80, 100, and 220. Rather than paint on varnish, most boys applied a number of thin coats with a rag. We used Epifanes marine varnish on the boat frame, applying it in the morning and then letting it dry through the day before putting the boats back inside over night. To hold the boats in place for this right side up work,we cut sections of 2x4 along the profile of the original molds and then squeezed clamped the boat and 2x4 cradles to sawhorses.

Here Andrew is attaching the kevlar roving to the gunwale using an iron as a heat source. We used regular clothes irons and a set of small travel irons for the work on the skins, available on Amazon for about 18.00. Two students elected not to use the kevlar roving, and the boats seemed to do fine without it. However we had built frames that were substantially more rugged than the specifications in Platt Montfort's designs.
We were all amazed at how the dacron shrunk when ironed. It was important to lay the cloth down so that the strands were set at an angle to the stringers and the ribs. We tugged the cloth tight and clamped it at the ends and to the gunwales. Then we bonded it to the gunwales and shrunk it from the middle working out to the ends. The boat in the foreground has the cloth shrunk on most of the boat and is waiting for the intricate
This photo shows Andrew attaching a strip of the heat bond tape to the stem. This stuff works very well and makes for a much more elegant and smooth stem than the traditional technique of sewing up a rolled seam at the stems. The boat on the left shows the way the dacron is stretched over the hull and then held in place by clamps while the edge is heat bond attached to the gunwales and keelson both of which had heat bond tape set in place.

This detail shows the dacron skin cut and pulled over the stem. Small pieces of heat bond tape have been set in between the stringers with the dacron then bonded both to them and a headband strip on the stem. In Montfort's plans, the second layer of dacron is then pulled over and bonded to a strip on the opposite side of the bow. We decided instead to cut a piece of heat bond tape down the middle, attach it to the stem and then bond the second layer at the stem, cutting off the excess. This makes for a more elegant look. With a cutwater screwed over the two layers and the skin also bonded by several coats of varnish, this modification seems to be strong enough.

Here is a close up of the stem with the two layers bonded. To cut and seal all the edges of the dacron, we used the Engel HSGM Hot Cutter - Pro available for 169.00 from Skinboat.org. This great little tool allowed us to make the very precise cuts needed around the stringers at the ends as well as accurate cuts along the gunwales.


