 |
| Stanchions stacked on the strong backs ready to mount |
Setting Up
1. After we set the strong backs on studio tables and sawhorses, we used a piece of taught fishing line attached at each end of the strong back to establish a level measure and a center line.
2. We then measured off the 2' intervals from the plans and drew lines perpendicular to the fishing line to establish the position of the station molds.
3. At each 2' interval, we mounted two 16" stanchions cut from 1"x2" common pine.
 |
| Colton mounts the station molds using the orange string to line them up along the center. |
Setting Up the Molds
1. We cut recycled bike box cardboard to the templates in the plans.
2. We attached the molds to the stanchions with 1" drywall screws.
3. We then ran a string along the top of the molds and used a level to insure that the molds were aligned with one another and set level between the two lines.

While the students cut their own molds, I made a set of masters to the molds because we are using 3/4 inch width stringers rather than the 3/8's the plans call for, so all of the notches have to be doubled in size.
 |
| Chris mounts stanchions on the strong back while Nate and Mathias cut molds from recycled bike boxes. |

Even though Monfort's notes mention using cardboard for the molds, we were skeptical that it would be able to withstand the compression toward the center of the boat from the stringers and the gunwales, especially because we were building with thicker wood. But the notched cleats we added to the two middle stations have taken care of the compression of the gunwales, all fabricated out of wood Home Depot had thrown out because of defects.
Even though our oversized stringers exert considerable compression, the cardboard has held up in all but several cases. Where it failed, we have merely hot-glued small scraps of wood to regain the original shape. Without the cardboard, we would have had to use a sheet of plywood per boat, all of which would have become scrap at the end of the project.
The Knee-Stem Assembly

Because the knee and stem are both curved and made of 3/8" oak and marine plywood, they are hard to clamp together with traditional clamps. I made jigs of scrap wood cut with a jig saw. Students then put pressure on the glued joint by lightly driving small wedges between the jig and the glued parts. The piece of white waxed paper prevents the glued pieces from sticking to the jig.
Ripping the Keelsons, Stringers, Gunwales, and Inwales
The best straight grained wood available locally was a set of Douglas fir boards in 1"x6"x15' from an excellent wood supplier, Anderson McQuaid, a mile from the school. They allowed me to select boards that were almost entirely knot free. Because the school's table saw does not have a long enough run to rip this length, I set my table saw with a 16' outrun in my garage and used three rollers, one set up in front of the saw to help roll the stock off the back of my pickup to the saw and two to catch the sawn lumber in out feed.
Plan on the better part of a weekend day if you are selecting and ripping the parts for a set of boats. Ours required 40 pieces of 1"x3/8"x15' for the keelsons, gunwales, and inwales and 80 3/4"x3/8"x15' pieces for the stringers.
I cut our knees on a scroll saw from 3/8" marine plywood and the oak stems from scraps of 3/8" quarter sawn oak but a common jig saw could easily make the cuts.
Gluing on the Stems
Next we glued a 1"x3/8" piece of Douglas fir to the two knees and stems with the stems temporarily hot glued to a cleat at each end. To allow students to clamp the curved knee to the stem, I made jigs with a piece of wood that matched the curve of the knee sandwiched between two rectangular pieces of wood.
 |
| Detail of clamping jig for knee/keelson assembly |

Pre-Bending the Gunwales
While we were completing the first steps, we had attached the gunwales to the two ends of the strong back and then bent the wood using a spacer block in the middle. The gunwales have to bend in a compound curve, and Monfort's notes recommend pre-bending the wood before adding it to the stations. This system worked quite well.

 |
| Detail showing notched plywood at each end to hold gunwales |
Mounting the Gunwales

The angles of the joint between stem and gunwales make it difficult to clamp. Here Andrew has used paper to cushion the zip tie he's using. Students found all kinds of ways to clamp using zip ties and combinations of conventional clamps.
Monfort recommends glueing the cut off ends of the gunwales and stringers to those pieces to create a flat clamping surface as in the example below:
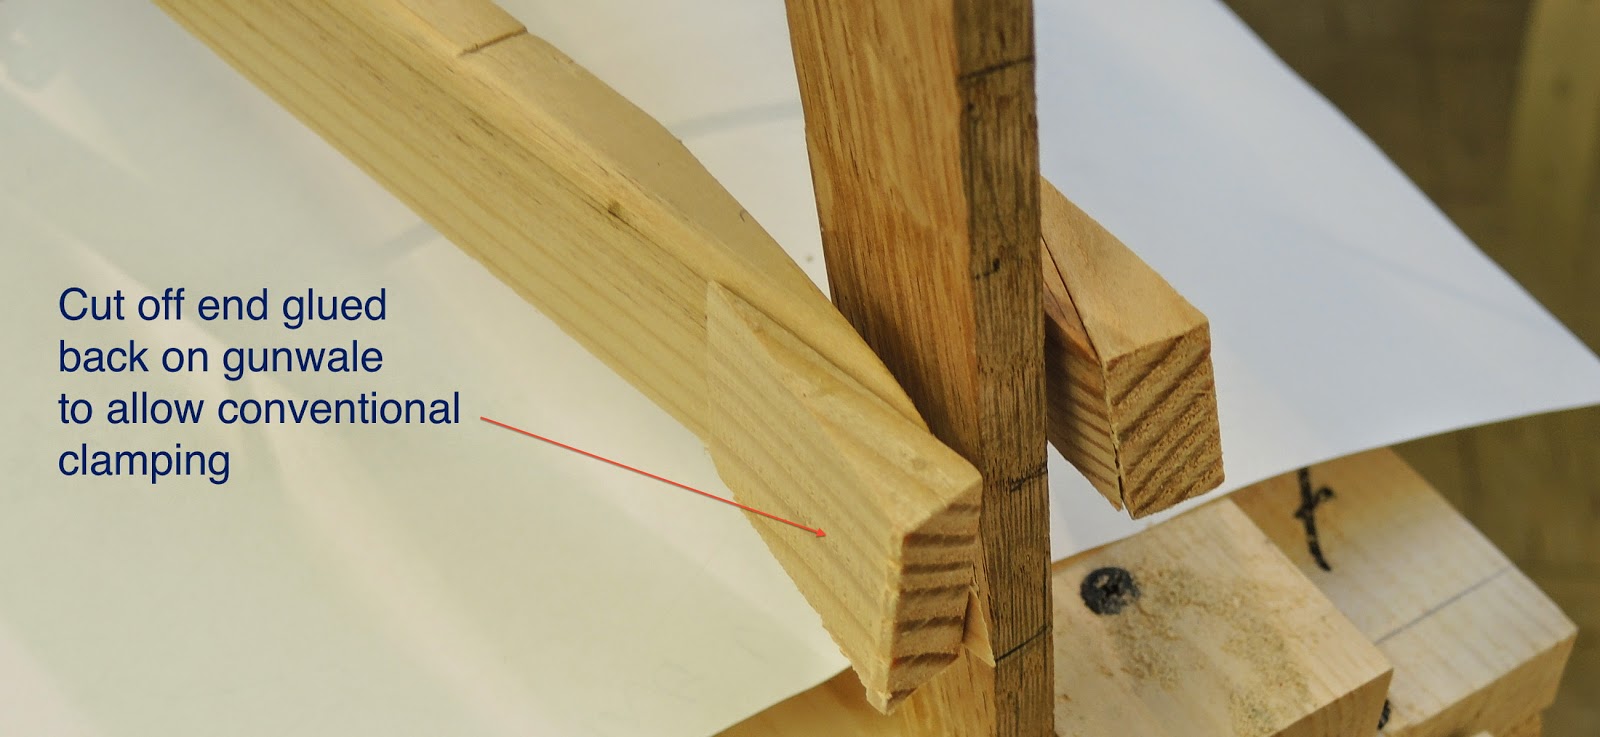
But this process can pull some of the gunwale's outer grain away with the wedge when you try to remove it. If you hot glue the wedges to your clamp and then hot glue 80 grit sandpaper to the surface, you can get the same clamping effect but without harming the surface of the gunwale.
Monfort recommends glueing the cut off ends of the gunwales and stringers to those pieces to create a flat clamping surface as in the example below:
But this process can pull some of the gunwale's outer grain away with the wedge when you try to remove it. If you hot glue the wedges to your clamp and then hot glue 80 grit sandpaper to the surface, you can get the same clamping effect but without harming the surface of the gunwale.
 |
 |
No comments:
Post a Comment